Inspirational Elastic Bracelet: Project Instructions
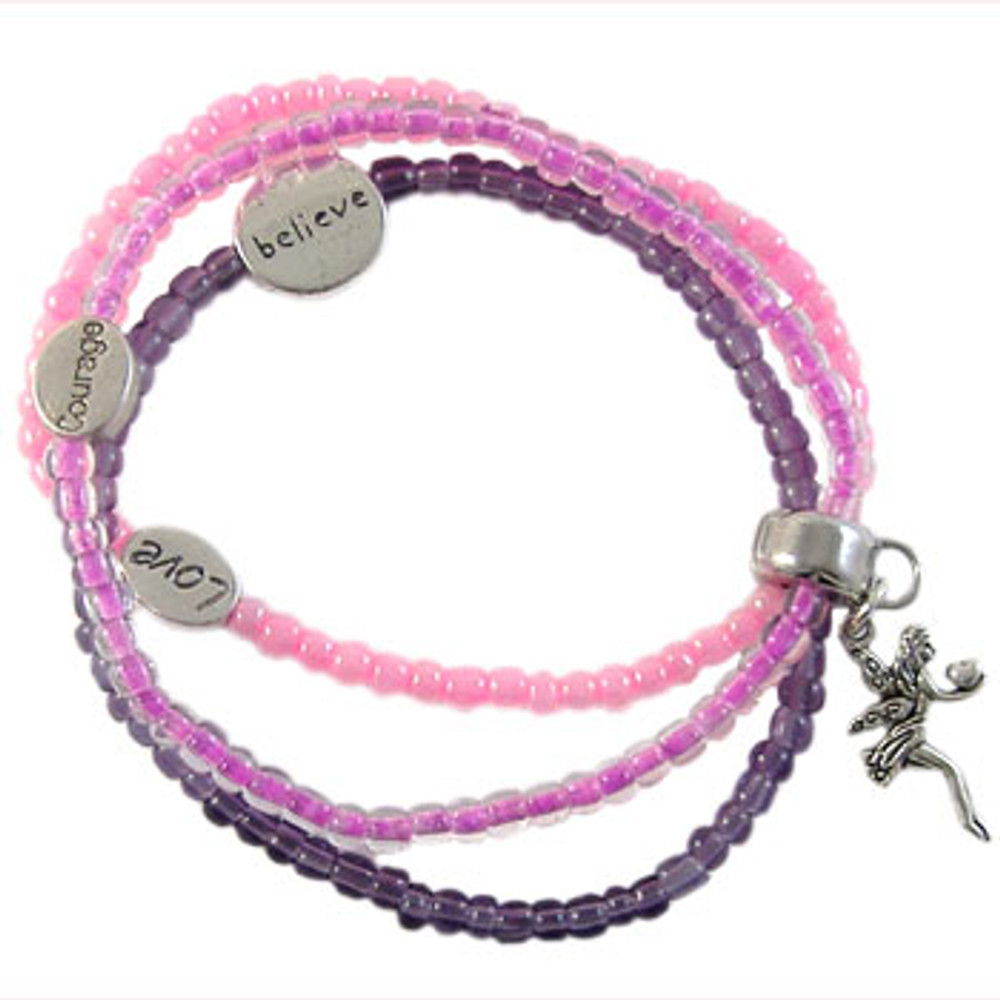
This unique bracelet is actually one long bracelet, combined with a clip or large hole bead. Features inspirational charm beads and pink and purple beads - follow our instructions to create your own.
MATERIALS REQUIRED
- 1 flower barrel leather drop OR large hole clip bead with loop
- 1 x 90cm 1mm beading elastic
- 59 size 5 purple seed beads
- 59 size 5 pastel pink seed beads
- 59 size 5 pink seed beads
- 1 'courage' metal charm bead
- 1 'love' metal charm bead
- 1 'believe'/'wisdom' metal charm bead
- 1 fairy metal charm
TOOLS REQUIRED
- Wire Cutters
- Crimping Pliers
- clear nail polish
INSTRUCTIONS
note: these quantities make an 21cm (medium) bracelet. To make a shorter bracelet, simply add less beads. The bead holding everything together can either be a flower barrel leather drop, or a large hole clip bead with loop, both work the same way.
Pick up your piece of beading elastic and tie a knot on one end. Cover with clear nail polish and allow to dry.
Next, thread onto your beading elastic:
- 41 x size 5 purple seed beads
- 1 x 'believe' (or 'wisdom') metal charm
- 18 x size 5 purple seed beads
Thread on the flower barrel leather drop (or the large hole clip bead with loop), followed by:
- 28 x size 5 pink seed beads
- 1 x 'courage' metal charm
- 29 x size 5 pink seed beads
Thread through the original flower barrel leather drop (or the large hole clip bead with loop), followed by:
- 39 x size 5 pastel pink seed beads
- 1 x 'love' metal charm
- 16 x size 5 pastel pink seed beads
Thread through the original flower barrel leather drop, then bring the two ends of the elastic together and pull up tightly, making sure the bracelet is tight. Tie a knot as if you're tying a balloon. Repeat the knot several times. Finish by adding a dab of clear nail polish or glue. Once dry, cut off any excess beading elastic.
Thread your fairy charm onto a jump ring and attach to the loop on the flower barrel leather drop (or large hole clip bead). As the jump rings are strong, you will need two sets of pliers to open them.
Your bracelet is now ready to wear!
© www.eurekabeads.com.au These free beading instructions may be used for personal use only [EX45221 EX98211]
Recent Posts
-
Simple Wooden Necklace: Project Instructions
Using large lightweight wooden beads, this versatile necklace can be worn long, eliminating the need …16th Dec 2025 -
Angel Earrings: Project Instructions
Create a sweet pair of handmade earrings featuring glass flower beads and angel wings. This beginner …19th Sep 2025 -
Midnight Shine Hematine & Crystal Bracelet Tutorial
Looking for a quick, elegant bracelet project using two-hole beads and silk thread? This step-by-ste …1st Jul 2025


