Multi Tier Peacock Necklace: Project Instructions
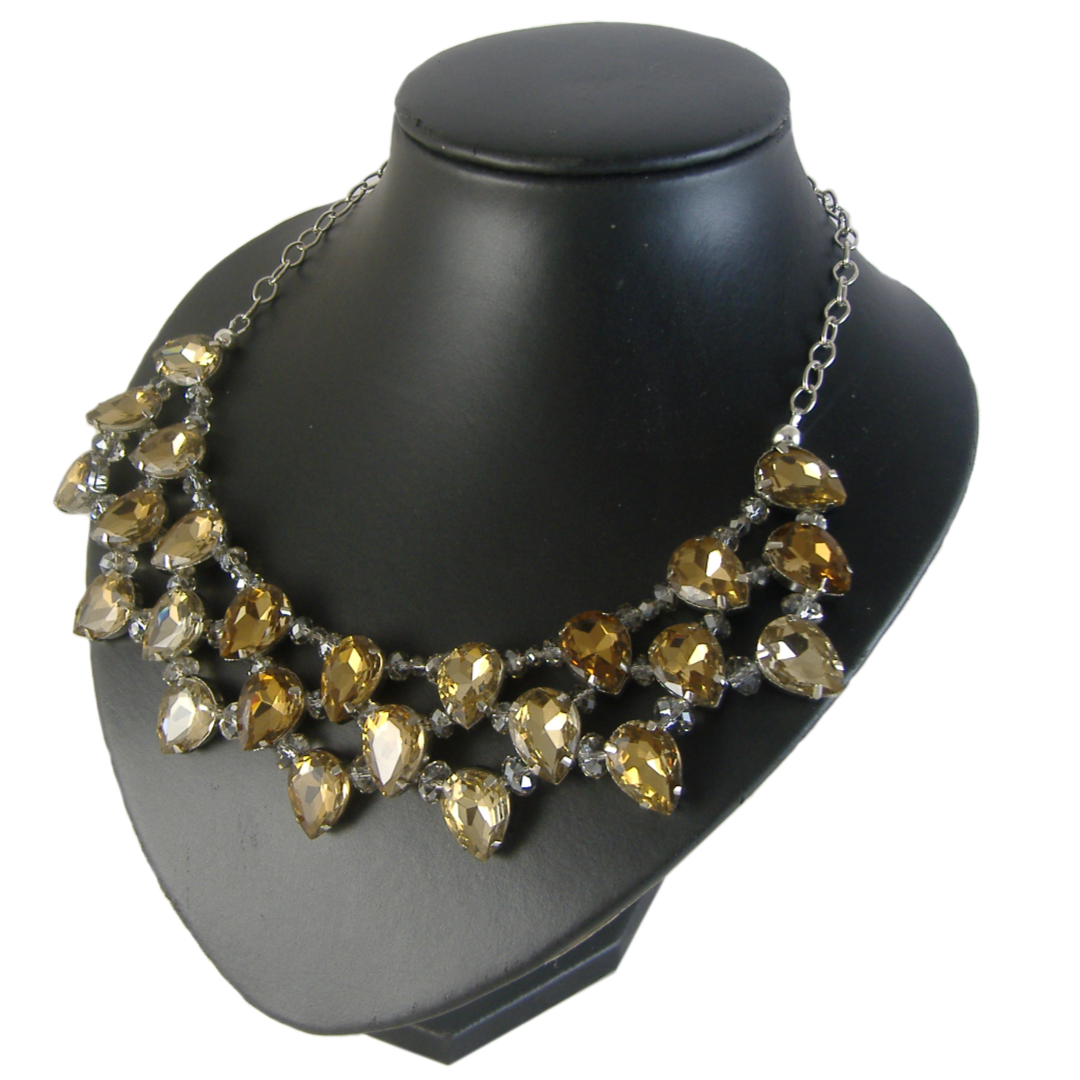
This elegant multi-strand necklace design features a blend of glass crystals, metal-encased teardrop beads, and chain elements. Perfect for crafters looking for an advanced jewellery-making project, this tutorial will guide you through the steps to craft a beautiful, statement-making necklace using crystal beads, metal filigree components, and tigertail wire. Whether you're creating it for yourself or as a gift, this sophisticated necklace will elevate your jewellery collection. Read on to learn how to make your own stunning piece with our easy-to-follow instructions.
MATERIALS REQUIRED
- 3 x 40cm tigertail
- 6 small tube crimps
- 2 wire protectors
- 2 large holed filigree metal beads
- 14 teal 18mm metal backed teardrop diamante
- 6 amber 18mm metal backed teardrop diamante
- 4 purple 18mm metal backed teardrop diamante
- 40 jet black ab 6mm rondelle glass crystal beads
- 4 x 11/0 clear glass seed beads
- 14 jet black ab 6mm bicone glass crystal beads
- 2 x 20cm flattened oval loop chain
- 1 parrot clasp
TOOLS REQUIRED
- 2 x crimping pliers
- wire cutters
INSTRUCTIONS
A note on terminology
When we refer to the "base" of the teardrop metal-backed beads, we are referring to the opposite side of the point or tip. You will need to “pop out” some of the crystals from their settings. Gently bend the 4 prongs around each crystal upright (using pliers or your fingernails) and carefully pull out the crystal, like changing a photo in a photo frame. Once you’ve finished crimping and assembling, replace the crystal back into its setting, and bend the prongs back into place.
Strand 1
- Take the first piece of tigertail and thread it through a small crimp and around a wire protector. Thread it back through the crimp, pull tightly, and crimp it down. Cut off any excess tigertail.
- Thread a large-holed filigree metal bead onto the tigertail, then continue with the following sequence:
- The base (fat end) of a teal 18mm metal-backed teardrop diamante
- 3 x jet black AB 6mm rondelle glass crystal beads
- The base of an amber 18mm metal-backed teardrop diamante
- 3 x jet black AB 6mm rondelle glass crystal beads
- The base of a teal 18mm metal-backed teardrop diamante
- 3 x jet black AB 6mm rondelle glass crystal beads
- Continue this pattern until the last teal 18mm metal-backed teardrop diamante, ending with 3 x jet black AB 6mm rondelle glass crystal beads.
3. Finish Strand 1 by threading through another large-holed filigree metal bead, a small crimp, and around a wire protector. Thread it back through the small crimp, pull tightly, and crimp it down. Cut off any excess tigertail, and tuck the squished crimp up inside the large-holed filigree bead.
Strand 2
- Lay Strand 1 out flat on the table with the teardrops pointing down (tips facing down).
- Pop out the teal crystal from the far left side of Strand 1.
- Take the second piece of tigertail and thread it through a small tube crimp. Starting from the center of the metal casing, thread the tigertail through to the left side of the casing and through an 11/0 clear glass seed bead.
- Bring the tigertail around the seed bead and back through the hole in the side of the metal casing. Thread it back through the original small tube crimp, pull tightly, and crimp down. Replace the crystal into the metal casing.
- Continue adding beads and following the pattern, using the sequence:
- 1 jet black AB 6mm rondelle glass crystal bead
- The base of a teal 18mm metal-backed teardrop diamante
- 1 jet black AB 6mm rondelle glass crystal bead
- The tip of the amber 18mm metal-backed teardrop diamante from Strand 1
- Continue alternating beads and teardrop diamantes in the same manner as Strand 1, making sure to follow the same sequence of colors and beads.
Strand 3
- Lay Strand 2 on the table, with the teardrops pointing down.
- Pop out the teal crystal from the far left side of Strand 2.
- Pick up the third piece of tigertail and thread it through a small tube crimp. Starting from the center of the metal casing, thread the tigertail through to the left side of the casing and through an 11/0 clear glass seed bead.
- Thread it around the seed bead and back through the hole in the side of the metal casing. Thread it back through the original small tube crimp, pull tightly, and crimp it down.
- Continue adding beads and following the same pattern as Strand 2, using the sequence:
- 1 jet black AB 6mm bicone glass crystal bead
- The base of an amber 18mm metal-backed teardrop diamante
- Continue with alternating beads and teardrop diamantes in the same pattern as in Strand 2.
Finishing it all off
- Open one end of your chain and thread it through one of the wire protectors. Close securely.
- Open up the link at the other end of the chain, add the parrot clasp, and close securely.
- Open the second length of chain and thread it through the other wire protector. Close securely.
- Your necklace is now complete and ready to wear!
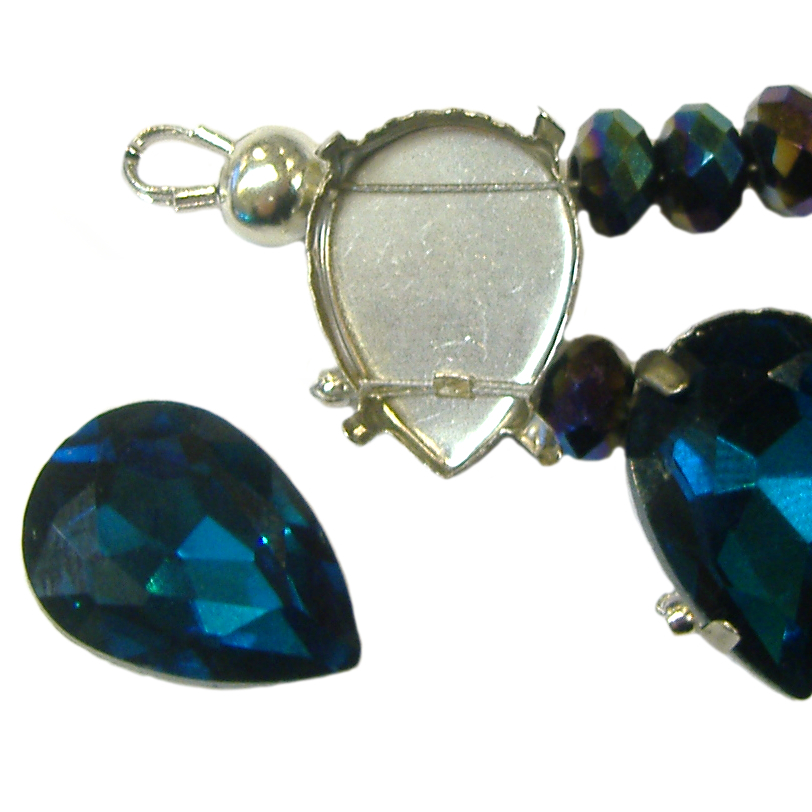
"Popping out" the crystal
© www.eurekabeads.com.au These free beading instructions may be used for personal use only [EX90451]
Recent Posts
-
Simple Wooden Necklace: Project Instructions
Using large lightweight wooden beads, this versatile necklace can be worn long, eliminating the need …16th Dec 2025 -
Angel Earrings: Project Instructions
Create a sweet pair of handmade earrings featuring glass flower beads and angel wings. This beginner …19th Sep 2025 -
Midnight Shine Hematine & Crystal Bracelet Tutorial
Looking for a quick, elegant bracelet project using two-hole beads and silk thread? This step-by-ste …1st Jul 2025


