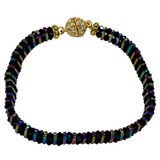
Twisted Wire Bracelet: Project Instructions
Learn how to make a twisted wire bracelet with our free beading tutorial! This wire-wrapped bracelet design uses delicate heishi glass beads and thin copper wire, creating an elegant handmade bracelet with a unique, organic shape. We used a purple bead mix, but you can customise it with your favourite colours. Perfect for jewellery makers of all skill levels, this DIY bracelet project is a great way to experiment with wirework techniques.
MATERIALS REQUIRED
- 1.8 metres of 28 gauge (0.3mm) beading wire
- 1 parrot clasp
- 2 jump rings
- approximately 60 x 7mm heishi glass beads
TOOLS REQUIRED
- Twirly Wirlie Pliers
- Wire Cutters
STEP-BY-STEP INSTRUCTIONS
Step 1: Prepare the Wire
- Cut a 1.8 metre length of wire.
- Fold the wire to create a bend 1 metre from one end. This creates two strands:
- Strand 1: 80cm
- Strand 2: 1 metre
- Slip a jump ring over the fold and twist the wire twice to secure it.
Step 2: Create Loops with Beads
- Take the shorter strand (Strand 1) and slide on a heishi glass bead, positioning it 20mm from the jump ring.
- Hold the bead in place, create a loop around your finger, and twist the wire like a twist tie to secure it.
- Repeat, adding another bead 20mm from the first loop, and continue until 50mm of wire remains.
- Lay the wire flat and bend the loops so that one faces up and one down.
Step 3: Weaving the Framework
- Take the longer strand (Strand 2) and thread it through the bead at the top of each loop, adding a bead between loops.
- Wrap the wire twice around the end, then repeat on the bottom loops.
- This forms the bracelet’s framework, which should measure about 220mm long.
- Work back through the bracelet in a zig-zag pattern, threading through outer beads and adding a bead between every section.
- At the end, twist the two wire ends together to form one strand.
Step 4: Add the Clasp, Make it Twisty & Finish the Bracelet
- Thread the twisted strand through a jump ring and twist it back on itself to secure it.
- Using Twirly Wirlie Pliers, gently twist the wire between the beads, creating an abstract zig-zag pattern.
- As you twist, the bracelet will shrink, becoming about 180mm long.
- Continue shaping the bracelet for a funky, abstract wire-wrapped design - adjust the length so that it will fit your wrist.
- Open a jump ring on one end and attach the parrot clasp.
Your twisted wire bracelet is now ready to wear!
© www.eurekabeads.com.au These free beading instructions may be used for personal use only. Visit www.eurekabeads.com.au for access to hundreds of free beading tutorials, creative inspiration, and expert tips. We are an Australia-based supplier, offering thousands of high-quality beads and jewellery-making products, with affordable prices and fast shipping Australia-wide. Explore our wide selection of beading materials, including glass beads, gemstone beads, seed beads, crystals, charms, findings, and stringing supplies to bring your projects to life! Whether you’re into DIY jewellery, bead weaving, macramé, or craft kits, we’ve got the supplies to support your creativity. [EX47212]
Recent Posts
-
Simple Wooden Necklace: Project Instructions
Using large lightweight wooden beads, this versatile necklace can be worn long, eliminating the need …16th Dec 2025 -
Angel Earrings: Project Instructions
Create a sweet pair of handmade earrings featuring glass flower beads and angel wings. This beginner …19th Sep 2025 -
Midnight Shine Hematine & Crystal Bracelet Tutorial
Looking for a quick, elegant bracelet project using two-hole beads and silk thread? This step-by-ste …1st Jul 2025


