Pixie Christmas Angel: Project Instructions
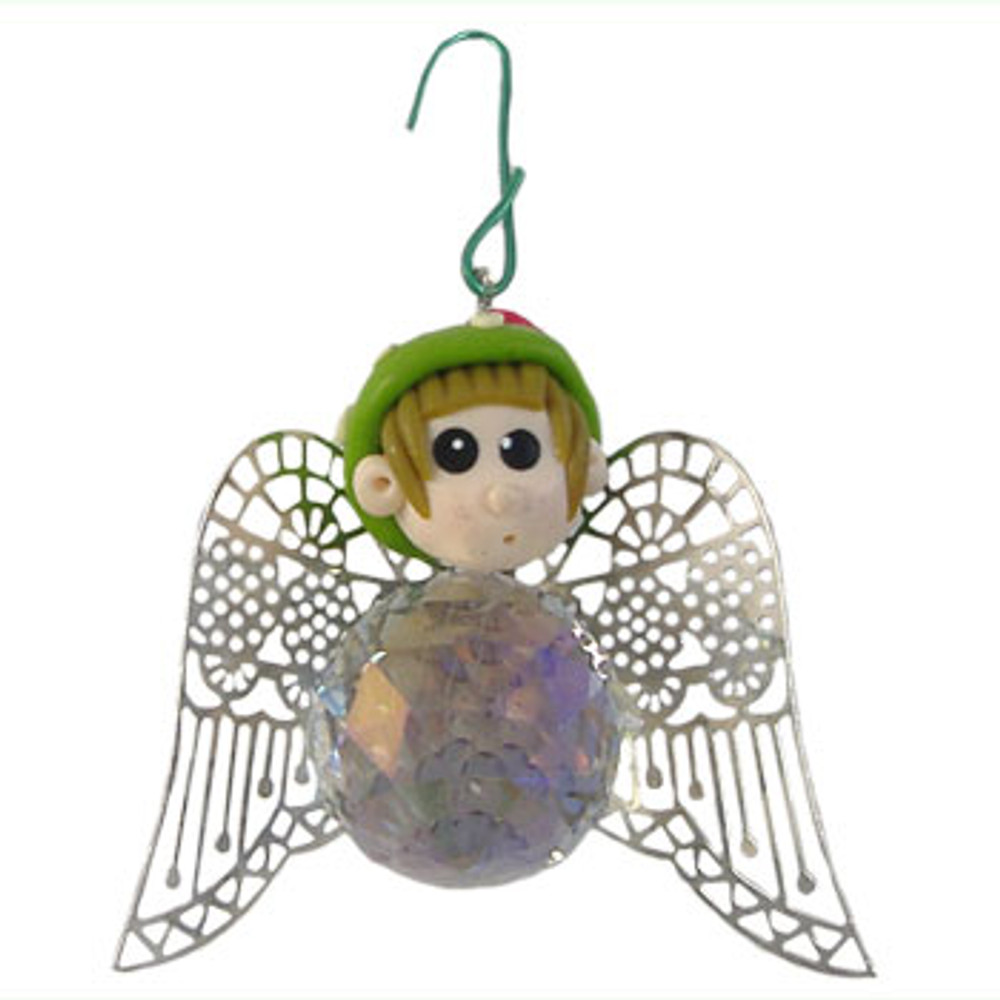
This gorgeous Christmas decoration makes use of our pixie clay beads to create an angel perfect for the tree. Follow our beading instructions to create your very own beaded Christmas ornament!
MATERIALS REQUIRED
- 40cm beading wire
- 1 clay head
- 1 x 21mm round faceted crystal
- 1 set of angel wings
TOOLS REQUIRED
- Wire Cutters
INSTRUCTIONS
Pick up your length of beading wire and fold in half. The angel wings have a series of three holes down the central piece. Thread one end of the beading wire through the bottom hole of the angel wings until you reach the kink in your wire from where you bent in in half. Now thread your wire back through the middle hole on your angel wings. Both ends of wire should now be on the same side.
Thread both ends through the top hole on your angel wings. Bring one end of wire through one side of the 21mm round faceted crystal, while also bringing the other end through the crystal from the opposite side. Now bring both wires up through your clay head.
Finally, form a small loop from the beading wire above your angels head and gently twist the wires together securing your loop and cut off any excess wire.
Attach the a christmas tree hook and your Christmas Angel is now ready to hang on your tree!
© www.eurekabeads.com.au These free beading instructions may be used for personal use only [EX00641 EX99741]
Recent Posts
-
Midnight Shine Hematine & Crystal Bracelet Tutorial
Looking for a quick, elegant bracelet project using two-hole beads and silk thread? This step-by-ste …1st Jul 2025 -
Blue Mirage Necklace: Project Instructions
How to Make a Stunning Blue Glass Bead Necklace with Pendant – DIY Jewellery Project Create yo …17th Jun 2025 -
DIY Bluebell Bronze Necklace – Multi-Strand Beaded Project
Bring some ocean-inspired charm to your jewellery collection with this elegant multi-strand necklace …11th Jun 2025


