

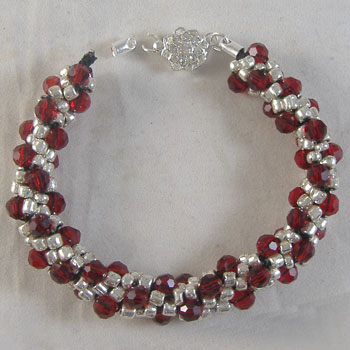
Silver & Red Beaded Kumihimo Bracelet: Project Instructions
Kumihimo is a traditional Japanese braiding technique that produces beautiful, intricate cords. This project takes Kumihimo to the next level by incorporating 6mm crystals and 6/0 glass seed beads. Using a foam board and bobbins to keep everything in place, you'll create a stunning bracelet with a unique beaded pattern.
MATERIALS REQUIRED
- 180 x 6/0 Glass Seed Beads
- 2 Glue-In Leather End Caps
- 2 x 6mm Strong Jump Rings
- 1 x Fancy Clasp
- 8m x #9 Nylon Beading Cord
- Large Keyring
- 60 x 6mm Round Glass Crystal Beads
TOOLS REQUIRED
- Round Kumihimo Board
- Thread Zapper
- E-6000 glue
- Big Hole Beading Needle
- 8 Bobbins
STEP-BY-STEP INSTRUCTIONS
This great project takes the standard kumihimo weave and adds beads - creating an amazing result. We recommend going over our instructions for the Sparkly Kumihimo Bracelet before starting this bracelet.
Step 1: Preparing Your Cord
-
Cut your cord into 4 equal pieces.
-
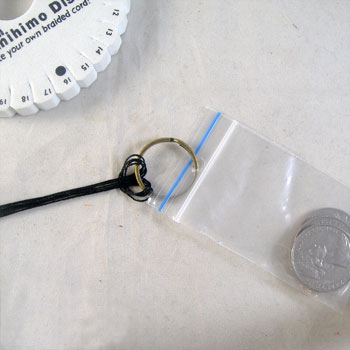
Fold the 4 strands in half and tie the halfway point onto a large keyring.
-
Pull all strands through the centre hole of the Kumihimo disk, leaving the keyring on the back side.
-
Attach a small weighted bag (such as a zip-lock bag with coins) to the keyring to maintain tens
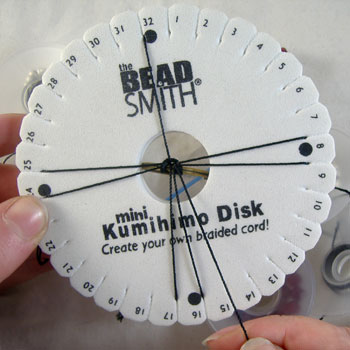
Step 2: Setting Up the Kumihimo Disk
-
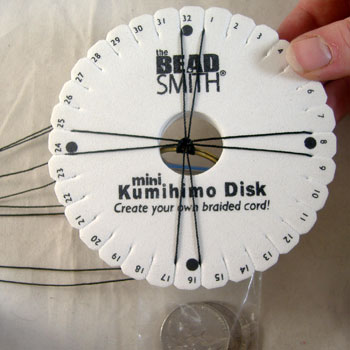
Place one strand on each side of the black dots on your Kumihimo board:
-
To the left and right of 32.
-
To the left and right of 8.
-
To the left and right of 16.
-
To the left and right of 24.
-
Step 3: Threading Beads
-
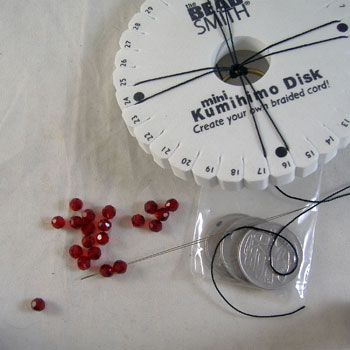
Use a big hole needle to thread beads onto each strand:
-
30 beads per strand.
-
Crystal beads on strands left of 32 and right of 16.
-
Seed beads on the remaining strands.
-
-
Thread through the last bead twice or three times to secure.
-
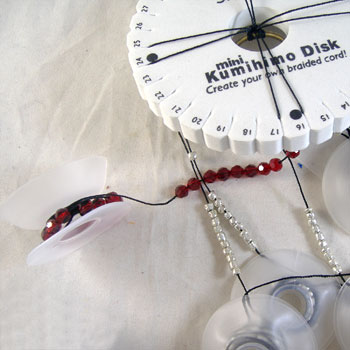
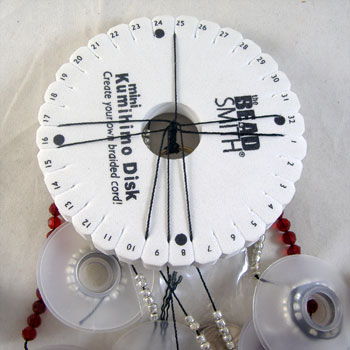
Wind each cord around a No-Tangle bobbin, leaving about 10 beads and 20cm of cord free.
Step 4: Starting the Braid
-
Position the disk so that 32 is at the top.
-
Move the right cord from 32 to the right of 15.
-
Move the left cord from 16 to the left of 31.
-
Rotate the board a quarter turn to the right (24 should now be at the top).
-
Move the right cord from 24 to the right of 7.
-
Move the left cord from 8 to the left of 23.
-
Repeat this pattern until you have 1.5cm of woven braid (about 2 full rotations).
If you need to pause whilst making your bracelet, always stop when you have three cords on the bottom. That way, when you restart, you will taking the cord from the bottom left and moving it to the top left, and continuing.
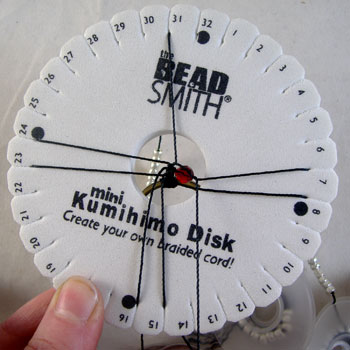
Step 5: Adding Beads
-
Slide a bead up each time you move a cord:
-
From the top right: slide a bead into the middle, tuck it under the crossing cord, then move the cord as usual.
-
From the bottom left: slide a bead into the middle, tuck it under the crossing cord, then move the cord as usual.
-
-
Continue this pattern, ensuring beads tuck under the previous cord to keep them on the braid's outer edge.
-
Keep the cords short to minimise tangling and unwind bobbins as needed.
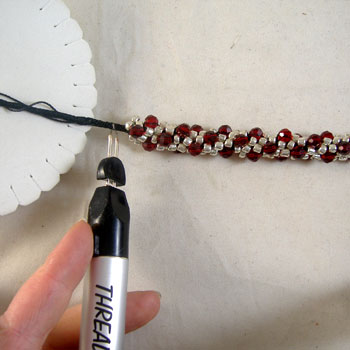
Step 6: Finishing the Braid
-
Stop adding beads when you reach your desired length (about 18cm for an average bracelet).
-
Continue braiding without beads for another 1.5cm.
-
Use a thread zapper to cut and melt the cord ends 8mm from the beaded section.
-
Repeat on the other end after removing the braid from the keyring.
Step 7: Attaching End Caps & Clasp
-
Apply E-6000 glue inside the glue-in leather end caps.
-
Insert the ends of the braid into the caps and allow 40 hours for full drying.
-
Use 6mm jump rings to attach the fancy clasp to both ends of the bracelet.
Pro Tip:
If you need to pause while making your bracelet, stop when three cords are at the bottom. This ensures you can easily resume by moving the bottom left cord to the top left.
Happy braiding!
© www.eurekabeads.com.au These free beading instructions may be used for personal use only. Visit www.eurekabeads.com.au for access to hundreds of free beading tutorials, creative inspiration, and expert tips. We are an Australia-based supplier, offering thousands of high-quality beads and jewellery-making products, with affordable prices and fast shipping Australia-wide. Explore our wide selection of beading materials, including glass beads, gemstone beads, seed beads, crystals, charms, findings, and stringing supplies to bring your projects to life! Whether you’re into DIY jewellery, bead weaving, macramé, or craft kits, we’ve got the supplies to support your creativity. [EX03355]
Recent Posts
-

Simple Wooden Necklace: Project Instructions
Using large lightweight wooden beads, this versatile necklace can be worn long, eliminating the need …16th Dec 2025 -

Angel Earrings: Project Instructions
Create a sweet pair of handmade earrings featuring glass flower beads and angel wings. This beginner …19th Sep 2025 -

Midnight Shine Hematine & Crystal Bracelet Tutorial
Looking for a quick, elegant bracelet project using two-hole beads and silk thread? This step-by-ste …1st Jul 2025