

Sparkly Kumihimo Bracelet: Project Instructions
The ancient art of Japanese cord work - kumihimo - is making a huge splash. Not dissimilar to macrame, using these handy foam boards from Beadsmith make creating a bracelet or necklace a snap.
MATERIALS REQUIRED
- 1 bead cap with clasp set
- 8 metres x 1mm black beading cord
- 1 x 45mm sparkly pave tube bead
TOOLS REQUIRED
- 1 kumihimo board
- Scissors
- Glue
INSTRUCTIONS
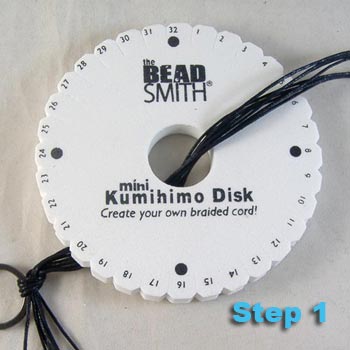
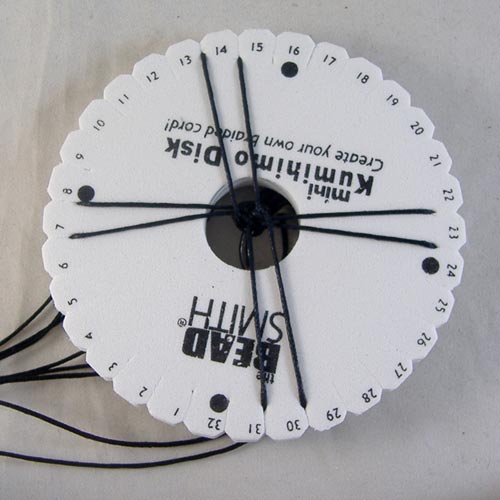
- Cut 8 pieces of cord 1 metre long. Gather one set of ends together and tie around the large weight ring. Pull all strands through the centre hole of the disk, leaving the ring on the back side. Bring it up tight.
- Starting at the top, pull one strand through the slit to the left of number 32. Pull the second strand through the slit to the right side of 32. Pull the third strand through the slit on the left of number 8 and the fourth through the slit on right of number 8. Continue with strand number five and six either side of number 16 and strand seven and eight either side of 24. You should now have one strand on each side of the black dots on your board.
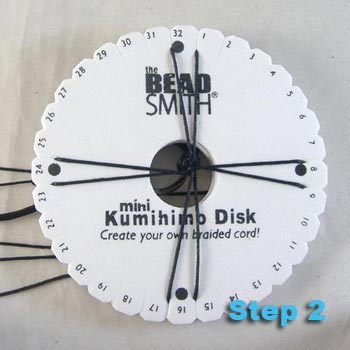
- Position the disk so that 32 is at the top. Now take the cord on the right of 32 and move it down to the slit between 14 and 15 (this is what is photographed). Then take cord between 16 and 17 and move it up to sit between 30 and 31 (ie from the top right to the bottom right, then from the bottom left to the top left).
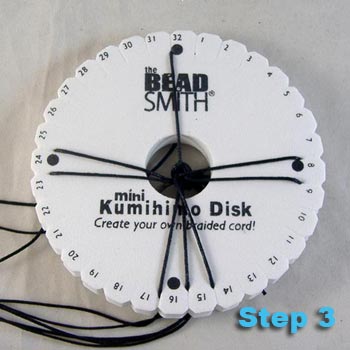
- Turn your disk a quarter turn to the right so that 24 is now at the top. Take the cord between 24 and 25 and move it to the slit between 6 and 7. Take the cord between 8 and 9 and move it up to the slit between 22 and 23 (ie, again, from the top right to the bottom right, then from the bottom left to the top left).
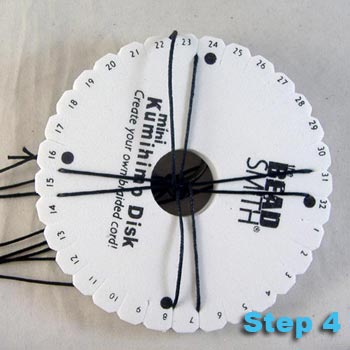
- Turn the disk one quarter turn to the right so that 15 is at the top. Take cord between 15 and 16 and move to between 29 and 30. Move cord between 31 and 32 up to between 13 and 14.
- Turn disk one quarter turn so that 7 is at the top. Move cord between 7 and 8 down to between 21 and 22. Move cord between 23 and 24 to between 5 and 6. Turn disk one quarter turn. Continue until you have 65mm of woven cord trailing down the back of the disk.
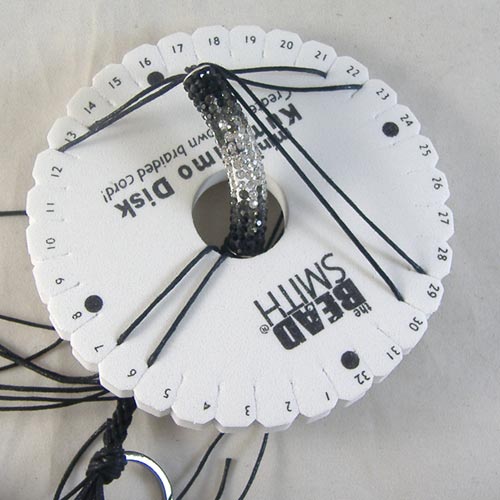
- Remove each of the cords and thread all cords through the pave tube. Bring it up tight to your weave then replace the cords in the original starting position. Ie: one either side of #32, one either side of #8, one either side of #16, and one either side of #24. Start doing the kumihimo pattern again until you have a further 65mm of Kumihimo weave.
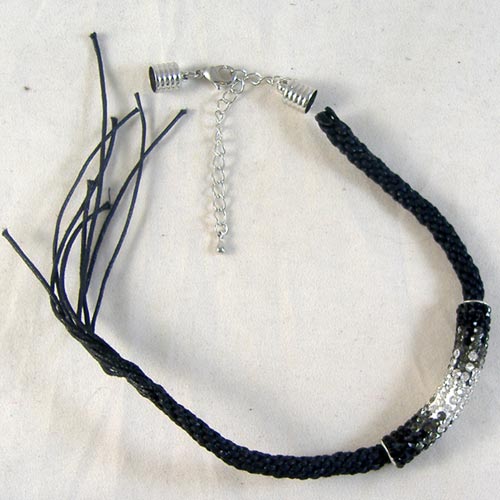
- Remove the strands and gather together tightly. Depending on what end caps you have, you may need to stretch the cord for the next step:
- If you have smaller end caps (like our 5mm plain end caps), gently tug at either end of the weave to stretch it - then carefully open the glue and glue the stretched strands together, close to the end of the weaving.
- If you have larger end caps (like our 7mm spiralled end caps), carefully open the glue and glue the strands together, close to the end of the weaving.
- Leave to dry for 10 minutes. Untie the weight ring and cut the ends so that you have a neat group at either end. Place more glue in the metal seat of the findings cap, then tuck the ends of the cord into the metal seat. Do the same with the other end. Allow plenty of time to fully dry (depending on your glue, this could be up to 40 hours).
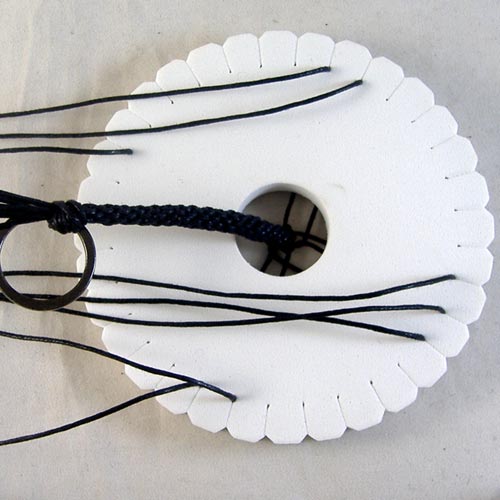
PRO TIP - if you need to pause whilst making your bracelet, always stop when you have three cords on the bottom (like in our third illustration). That way, when you restart, you will taking the cord from the bottom left and moving it to the top left. If you stick to this habit, you shouldn't lose your spot!
This kumihimo pattern is known as the an 8 warp braid, look forward to more instructions from Eureka! Beads on how to use more strands!
© www.eurekabeads.com.au These free beading instructions may be used for personal use only [EX20351 EX99351]
Recent Posts
-

Simple Wooden Necklace: Project Instructions
Using large lightweight wooden beads, this versatile necklace can be worn long, eliminating the need …16th Dec 2025 -

Angel Earrings: Project Instructions
Create a sweet pair of handmade earrings featuring glass flower beads and angel wings. This beginner …19th Sep 2025 -

Midnight Shine Hematine & Crystal Bracelet Tutorial
Looking for a quick, elegant bracelet project using two-hole beads and silk thread? This step-by-ste …1st Jul 2025