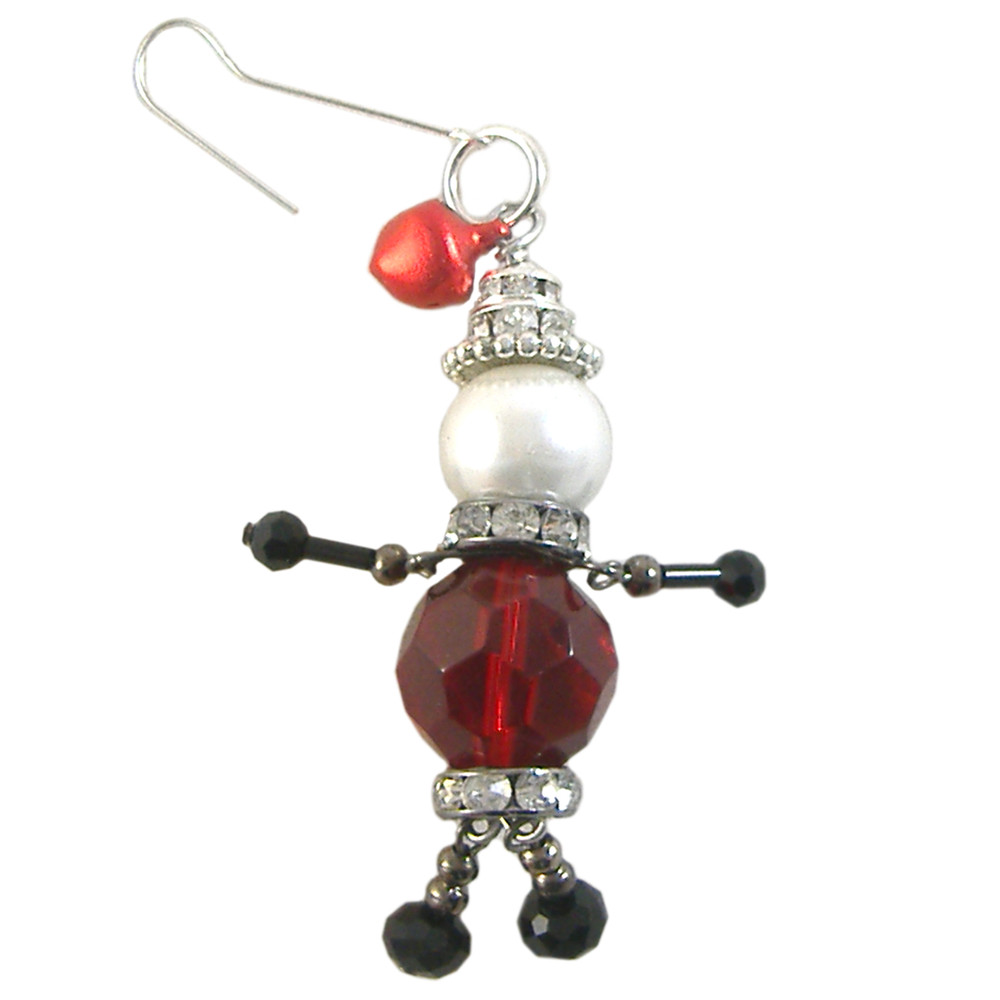
Swinging Santa Decoration: Project Instructions
Get ready for Christmas with this adorable Swinging Santa decoration, featuring a large glass crystal for the body, a white glass pearl as the head and black arms and legs, this ornament is perfect for the Christmas tree!
MATERIALS REQUIRED
- 4 x 50mm black head pins
- 2 x 6mm black rondelle crystals
- 6 x 3mm black plain metal beads
- 2 x 4mm black round crystals
- 2 x 4mm black bugle beads
- 1 x 50mm black eye pin
- 15cm x silver 20 gauge wire
- 2 x 10mm black diamante rondelles
- 1 x 16mm dark red round crystal
- 1 x 10mm white glass pearl
- 1 x 12mm silver saucer bead
- 1 x 8mm silver diamante rondelle
- 1 x 6mm silver diamante rondelle
- 1 x 3mm silver plain metal beads
- 1 red small jingle bell
- 1 x 8mm silver jump ring
- 1 x 50mm silver eye pin
TOOLS REQUIRED
- Twirlie Wirlies
- Crimping Pliers
- Wire Cutters
INSTRUCTIONS
We'll start by making the components for this decoration, and finish with putting them all together!
Santa’s legs
Take a black headpin and thread on:
- 1 x black 6mm rondelle crystal
- 2 x black 3mm plain metal beads
Leaving a space of 10mm, cut the excess off the head pin. Twirl the end using your twirly wirlies. Repeat to make the second leg.
Santa’s arms
Take a black headpin and thread on:
- 1 x black 4mm glass crystal
- 1 x black 4mm bugle bead
- 1 x black 3mm plain metal bead
Leaving a space of 10mm, cut the excess off the head pin. Twirl the end using your twirly wirlies. Repeat to make the second arm.
Santa’s shoulders
To make the “shoulders” take a black eyepin and leaving the tail, turn a second loop 6mm up from the eye. Turn a third loop a further 6mm up and then cut off the excess. Now attach Santa’s arms - one to each of the end loops and put aside.
Santa’s body core
Take your piece of 20 gauge wire and turn a loop on one end using your twirly wirlies. Turn a second loop right next to the first so that you have a figure 8 with the tail coming off the middle. These loops are Santa’s “hips” and you can now attach his legs - one to each of the loops you have just created and put aside.
On the long part of wire (Santa’s body core) you now need to thread on:
- 1 x black 10mm sparkly rondelle
- 1 x red 16mm glass crystal
- Santa’s “shoulders and arms” (through the centre loop)
- 1 x black 10mm sparkly rondelle
- 1 x white 10mm glass pearl
- 1 x 12mm saucer metal bead
- 1 x silver 8mm sparkly diamante rondelle bead
- 1 x silver 6mm sparkly diamante rondelle bead
- 1 x silver 3mm plain metal bead
Leave a space of 10mm above the top of Santa’s “hat” and cut the excess off the beading wire. Make a loop using your twirlie wirlies at the top of Santa’s “hat” and attach the small red jingle bell to the loop. Open the silver 8mm jump ring and attach to the top of the loop. Take the silver eye pin and fashion a hook then attach the loop to the jump ring. Your swinging Santa is all ready for your tree!
© www.eurekabeads.com.au These free beading instructions may be used for personal use only [EX50654]
Recent Posts
-
Blue Mirage Necklace: Project Instructions
How to Make a Stunning Blue Glass Bead Necklace with Pendant – DIY Jewellery Project Create yo …17th Jun 2025 -
DIY Bluebell Bronze Necklace – Multi-Strand Beaded Project
Bring some ocean-inspired charm to your jewellery collection with this elegant multi-strand necklace …11th Jun 2025 -
Create Your Own Ruby Glow Front Toggle Drop Necklace: Easy Instructions
Looking for a unique beading project? This DIY necklace tutorial features striking red foil glass be …10th Jun 2025


